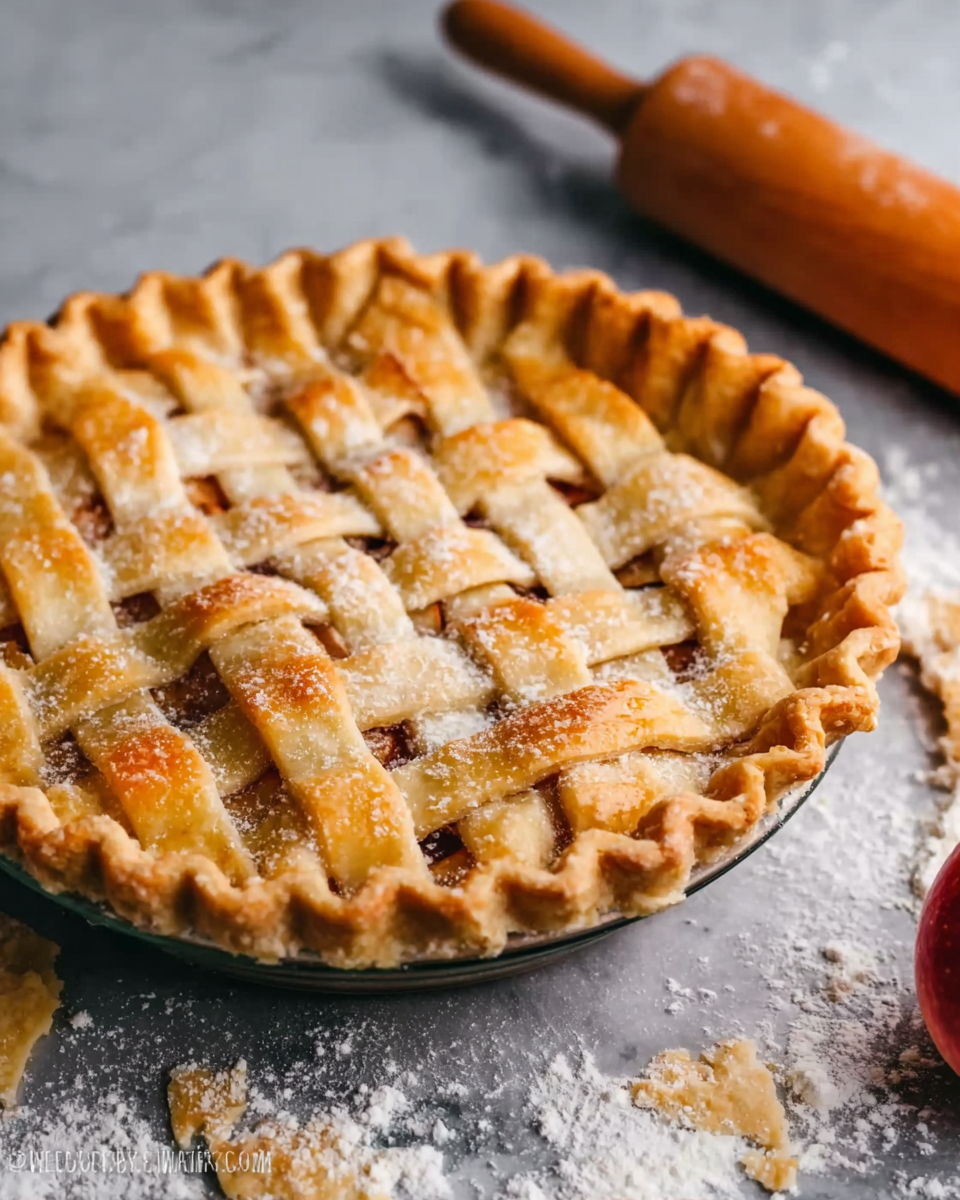
This Homemade Buttery Flaky Pie Crust recipe is a must-try for anyone who loves to bake. The crust is made with a perfect balance of butter and shortening, resulting in a flaky and tender texture that’s ideal for both sweet and savory pies. With step-by-step instructions and helpful tips, this recipe will give you the confidence to make the best pie crust from scratch every time.
Full Recipe:
Ingredients
-
2 ½ cups (315g) all-purpose flour, spooned & leveled
-
1 tsp salt
-
6 tbsp (85g) unsalted butter, chilled and cubed
-
2/3 cup (130g) vegetable shortening, chilled
-
½ cup (120ml) ice-cold water
Directions
-
Prepare the ingredients: In a large bowl, whisk together the flour and salt. Keep the bowl in the refrigerator or freezer to chill.
-
Cut in the fats: Add the cubed butter and shortening to the flour mixture. Use a pastry cutter or two forks to cut the fats into the flour until the mixture resembles coarse meal with pea-sized lumps of fat.
-
Add water: Drizzle the ice-cold water into the dough, 1 tablespoon at a time, stirring after each addition. Stop adding water when the dough starts to clump together into large pieces.
-
Form the dough: Transfer the dough to a floured work surface. Use your hands to gently bring it together into a ball. If the dough is too dry or crumbly, add a little more cold water. If it’s too sticky, add more flour.
-
Divide and chill: Split the dough in half, flatten each half into a 1-inch-thick disc, and wrap them tightly in plastic wrap. Chill in the refrigerator for at least 2 hours or up to 5 days.
-
Roll out the dough: Once chilled, roll out the dough on a floured surface. It should be about 1/8-inch thick and fit into a 9-inch pie dish. Use your rolling pin to transfer it to the pie dish.
-
Trim and shape: Trim the edges of the dough, leaving about a 1-inch overhang. Fold the overhang back and crimp the edges to create a decorative border.
Nutrients (per serving, approx.)
-
Calories: ~150
-
Total Fat: ~9g
-
Saturated Fat: ~4g
-
Carbohydrates: ~17g
-
Sugars: ~0g
-
Fiber: ~1g
-
Protein: ~2g
Why Use a Combination of Butter and Shortening?
The key to a perfect pie crust is the fat. The fats used in the dough affect both the flavor and texture of the finished crust. Butter provides richness and flavor, while shortening helps create the flaky texture that’s characteristic of a great pie crust. When combined, butter and shortening create the perfect balance: butter adds flavor and a slightly tender texture, while shortening helps the dough hold together and creates those coveted flaky layers.
Butter alone can result in a crust that’s too dense and firm, while shortening alone can lack flavor. By using both, this recipe ensures that the crust will be flavorful, flaky, and easy to work with. The shortening contributes to the flakiness by helping the dough to separate into thin layers as it bakes, while the butter provides a rich, buttery flavor that makes the crust irresistible.
The Importance of Cold Ingredients
One of the most important factors in making a flaky pie crust is keeping everything cold. Cold ingredients—especially the butter, shortening, and water—help to create those distinct flaky layers. When cold fat is incorporated into the dough, it forms small pockets that expand as the dough bakes, resulting in a light, airy texture. If the fat melts before it reaches the oven, the dough will become greasy and dense, losing the desirable flakiness.
To ensure that your pie crust turns out perfectly flaky, it’s crucial to chill the flour and the bowl before starting. Keeping the fat as cold as possible throughout the process is key. In fact, many bakers recommend chilling the dough for a couple of hours before rolling it out. This resting period not only ensures that the fat remains solid, but it also gives the gluten time to relax, resulting in a more tender crust.
The Key Steps to Achieving Flaky Perfection
Making Homemade Buttery Flaky Pie Crust requires a few essential steps that are critical to getting that perfect texture. The first step is to cut the butter and shortening into the flour. This is done by using a pastry cutter or two forks to work the fat into the flour until the mixture resembles coarse meal with pea-sized lumps of fat. The more evenly distributed the fat is throughout the flour, the better your chances of achieving that flaky texture.
Once the fat is incorporated, the next step is to add ice-cold water. It’s important to add the water slowly and mix just enough to bring the dough together. The dough should not be overworked, as this can lead to a tough crust. After the dough has come together, it’s essential to rest it in the refrigerator to allow the fat to solidify and the gluten to relax. Chilling the dough is a critical step in achieving the perfect texture.
Rolling and Shaping the Dough
Once the dough has chilled, it’s time to roll it out. Start by lightly flouring your work surface to prevent the dough from sticking. Roll the dough from the center outwards, turning it as you go to ensure an even thickness. It should be rolled out to about 1/8-inch thickness, which is the perfect thickness for a pie crust.
When transferring the dough to the pie dish, use your rolling pin to lift it without stretching it. If the dough tears or becomes too warm and soft to handle, simply refrigerate it again until it firms up. Once the dough is in the pie dish, trim the edges so that there’s about a 1-inch overhang. This extra dough is folded back and crimped to form a decorative edge. A well-shaped pie crust not only makes the pie look beautiful but also ensures that the crust holds its shape during baking.
Baking Tips for a Perfect Crust
To achieve a perfectly baked pie crust, it’s important to follow a few simple baking tips. If you’re baking the pie crust without a filling (such as for a quiche or custard pie), it’s best to blind bake it. This involves lining the crust with parchment paper or aluminum foil and filling it with pie weights or dried beans to prevent the dough from puffing up. After 15-20 minutes of blind baking at 375°F (190°C), remove the weights and parchment, then bake for an additional 5-10 minutes until the crust is golden and fully set.
If you’re baking the pie with a filling, you’ll typically want to bake the pie at a higher temperature to ensure the crust cooks fully without becoming soggy. For sweet pies, you can also brush the crust with a bit of egg wash (a beaten egg mixed with a splash of water) before baking to create a glossy, golden finish.
Versatility for Sweet and Savory Pies
One of the best aspects of Homemade Buttery Flaky Pie Crust is its versatility. This recipe works wonderfully for both sweet and savory pies. For sweet pies, like apple or cherry pie, you can add a small amount of sugar to the dough for a slightly sweeter crust. If you’re making a savory pie, like a chicken pot pie or quiche, the crust is perfect as it is—flaky, tender, and rich without being overly sweet.
The richness of the butter and shortening combination allows the crust to complement any filling, from fruit to custard, to hearty savory fillings like beef or vegetables. The versatility of this recipe ensures that no matter what kind of pie you’re making, you’ll have a crust that enhances the flavors of the filling without overwhelming them.
Storage and Freezing Options
One of the advantages of Homemade Buttery Flaky Pie Crust is that it can be made in advance and stored for later use. Once the dough has been prepared and chilled, you can wrap it tightly in plastic wrap and store it in the refrigerator for up to 5 days. If you’d like to prepare the crust even further in advance, you can freeze it. Simply wrap the dough in plastic wrap, then place it in an airtight container or freezer bag. The dough can be frozen for up to 3 months. When you’re ready to use it, allow it to thaw in the refrigerator overnight before rolling it out.
Conclusion
Making Homemade Buttery Flaky Pie Crust from scratch is a rewarding process that yields a delicious, tender, and flaky crust that will elevate any pie. With the right balance of butter and shortening, along with a few simple techniques, you can create a pie crust that’s perfect for both sweet and savory pies. The one-two punch of a chilled dough and a careful rolling and crimping technique ensures that you get the best possible texture every time. Whether you’re making a classic dessert or a savory pie for dinner, this recipe will give you the confidence to bake a pie crust from scratch that’s sure to impress.

